Felt Cat Bookmark DIY: How to Make a Peeking Cat Bookmark in One Afternoon
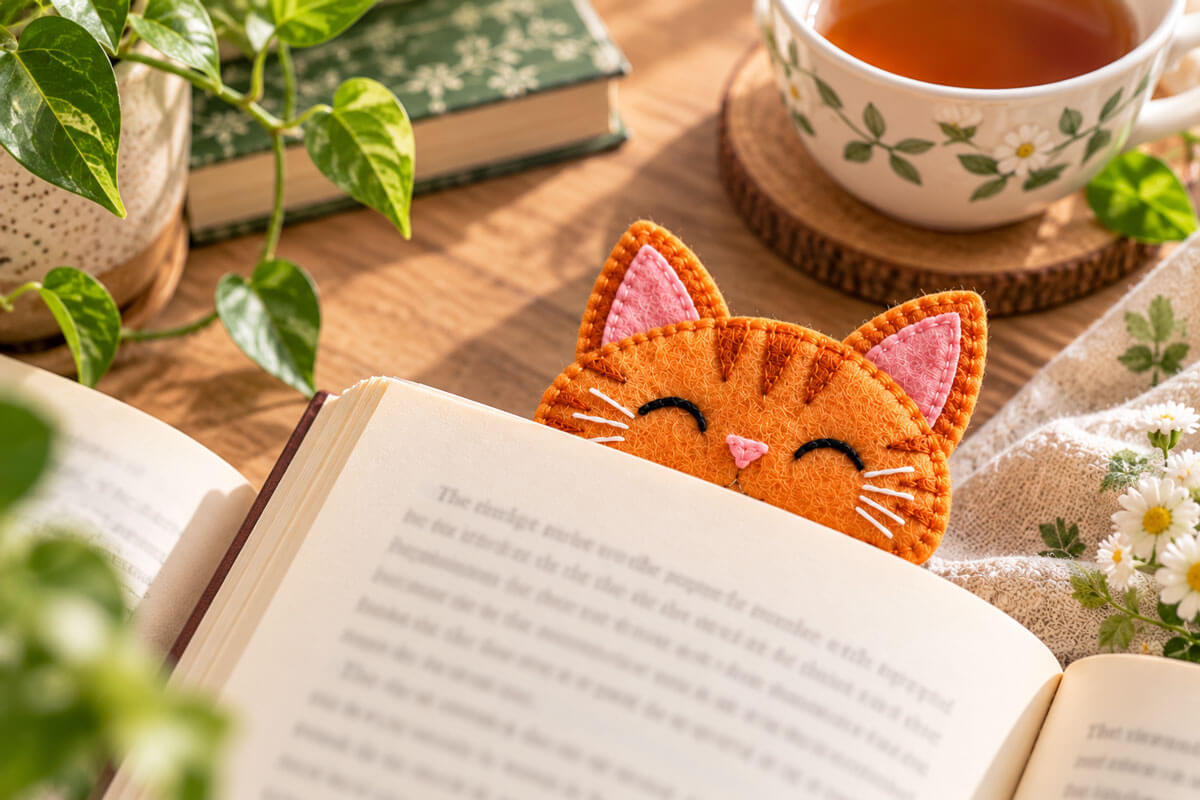
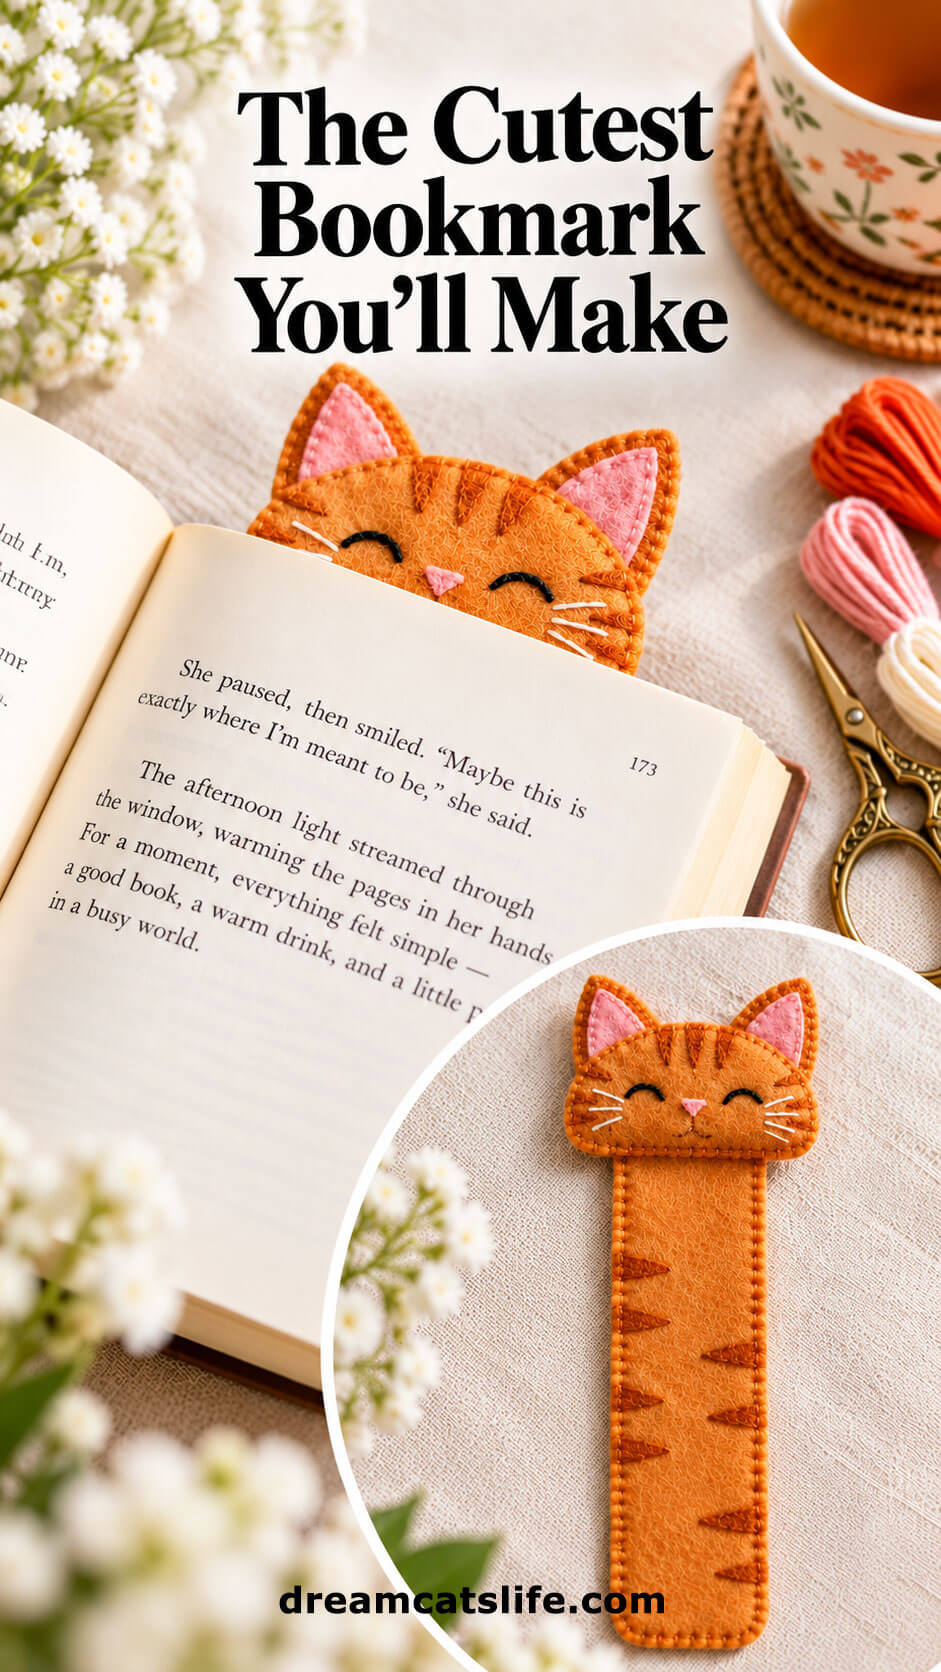
A felt cat bookmark DIY is one of the easiest hand-sewing projects you can make. You need a few scraps of felt, embroidery floss, a needle and about 90 minutes. The result is a cat bookmark whose head peeks over the top of the page while the body slips between the pages. This guide covers materials, pattern sizes, every stitching step, troubleshooting, variations and FAQs.
Quick Project Summary
| Detail | Info |
|---|---|
| Project | Felt cat bookmark (peeking cat design) |
| Skill level | Beginner |
| Time needed | 60-90 minutes |
| Finished size | About 2 x 6 inches (5 x 15 cm) body plus head |
| Main materials | Felt, embroidery floss, needle, scissors |
| Cost | Under $10, or nearly free with scrap felt |
| Best for | Gifts, book lovers, using up leftover felt |
Why a Felt Cat Bookmark Is the Perfect First Sewing Project
Felt doesn’t fray
You can cut felt into any shape and the edges stay clean, so there are no hems to fold and no seams to finish.
It uses only a few simple stitches
The whole bookmark needs a running stitch, a blanket stitch (or whipstitch) and a few straight stitches for the face. If you can thread a needle, you can make it.
It looks great for how little it takes
Only the head shows above the page, so the bookmark is recognizable on a shelf, and it works as a handmade gift. It also uses up the small felt scraps most crafters already have.
Felt is also thick enough that the bookmark won’t crease the way paper can, and it doesn’t scratch or mark the pages.
Materials You’ll Need
Collect everything first so the stitching goes smoothly.
Felt
- One 2 x 6 inch felt rectangle for the body (front), plus a second one for the back
- Felt for the cat head: two head-shaped pieces (front and back), each with two triangle ears attached at the top
- Two small pink felt triangles for the inner ears
- A tiny scrap of pink felt for the nose, or a few pink floss stitches
- Optional: darker orange or brown felt scraps for the tabby stripes
Thread and tools
- Black embroidery floss for the eyes
- White floss for the whiskers (any contrasting color works)
- Floss in a matching or contrasting color for the outline stitching
- Embroidery needle, size 5-7
- Sharp, small scissors
- Fabric glue or a fabric-safe glue stick (optional but helpful)
- Pins or sewing clips
- Printed pattern (see below)
- Washable fabric marker or chalk pencil
Where to buy supplies
If you don’t have a craft stash yet, these Amazon searches will show you what you need:
- Assorted felt sheets for crafts, a multi-color pack is the cheapest way to get orange, pink and cream
- Wool blend felt sheets, thicker and softer, with a more professional finish
- Embroidery floss set, a starter set gives you black, white and pink in one go
- Embroidery needles assorted, look for sizes with a larger eye
- Small embroidery scissors, sharp tips are useful for cutting out the ears
- Fabric glue for felt, helps hold the pieces in place while you stitch
- Sewing clips for crafts, better than pins for thick felt
The Felt Cat Bookmark Pattern
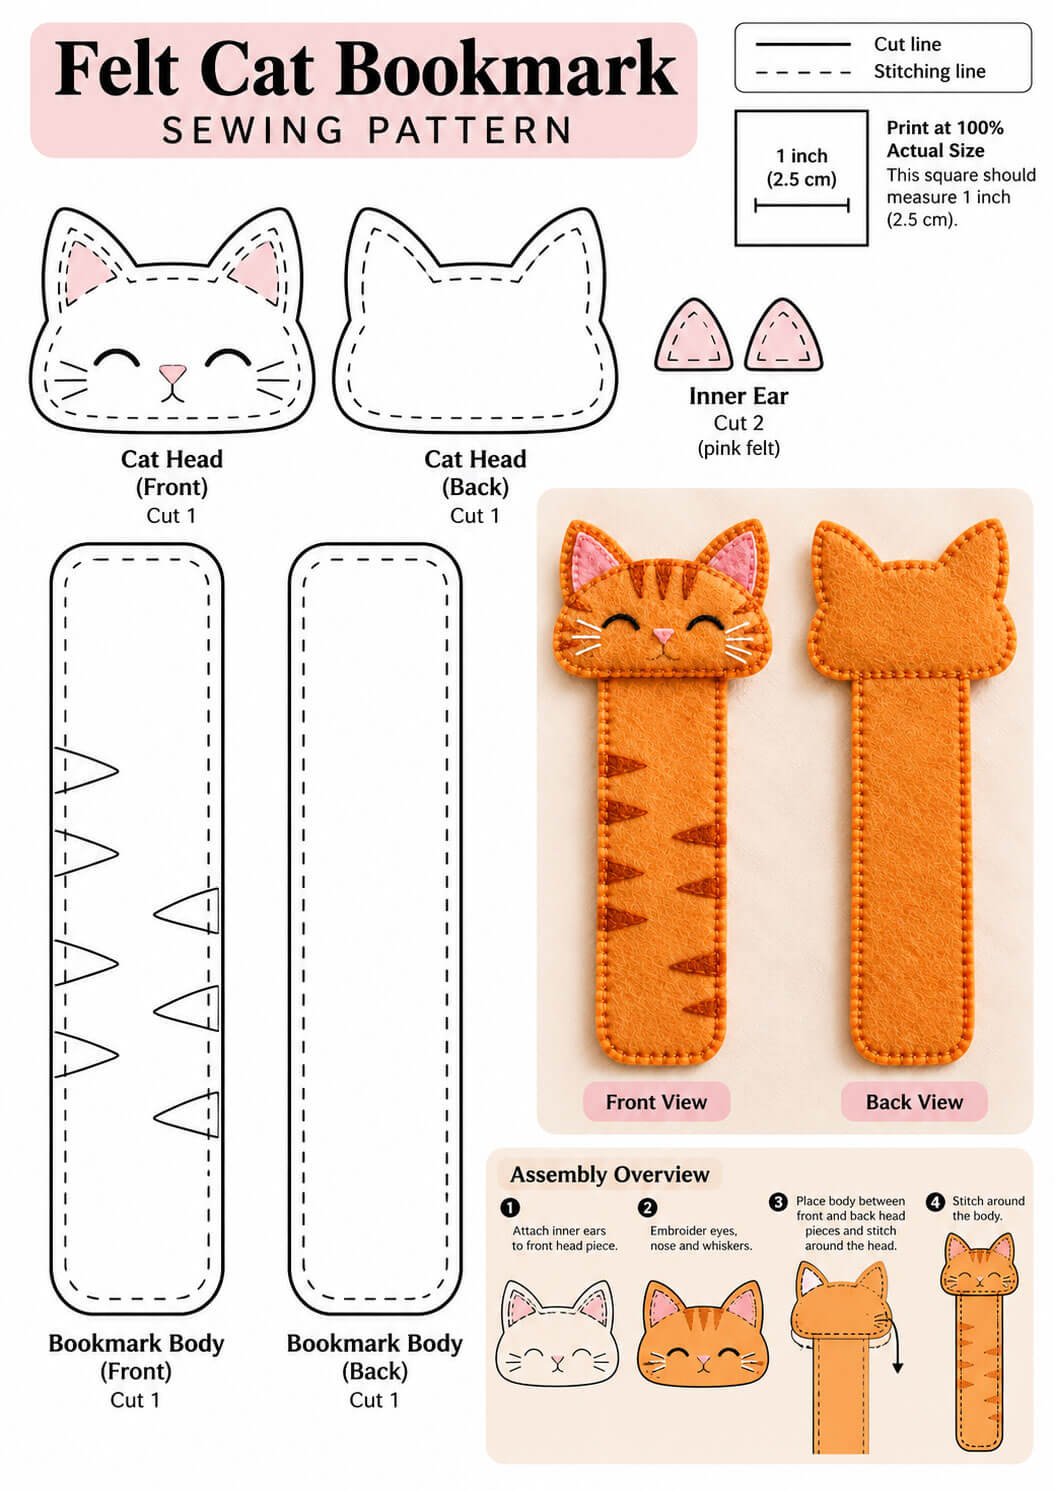
The pattern sheet has six pieces:
| Piece | How many | Felt color |
|---|---|---|
| Cat head (front) | 1 | Main color |
| Cat head (back) | 1 | Main color |
| Bookmark body (front) | 1 | Main color |
| Bookmark body (back) | 1 | Main color |
| Inner ear | 2 | Pink |
| Tabby stripes (optional) | 6-8 | Darker orange or brown |
On the sheet, a solid line is the cut line and a dashed line is the stitching line. Print it at 100% actual size. The 1 inch (2.5 cm) test square on the sheet should measure exactly one inch when printed. If it doesn’t, check your printer’s scaling settings.
Pattern tip
Cut the paper pieces out first, pin them to the felt and trace around them with a fabric marker. Pins can distort thick felt, so for wool-blend felt, tracing is more accurate.
How to Make a Felt Cat Bookmark: Step-by-Step
Step 1: Cut all the pieces
Cut the felt along the solid lines. Cut the head pieces slowly, because the ears are the trickiest part. Turn the felt rather than the scissors around the ear tips so the points stay sharp.
You should end up with two head pieces, two body strips, two pink inner ears and optional stripes. Cut smooth, continuous lines instead of short snips, which leave tiny notches on the edge that show up once you stitch.
Step 2: Attach the inner ears
Place each pink triangle inside an ear of the front head piece, lined up with the dashed line on the pattern. Glue it down with a small dot of fabric glue or pin it in place.
Stitch around the pink triangle with a running stitch or small whipstitch, using pink or matching floss. Use only one or two strands. Thick floss makes the small ear look bulky.
Step 3: Add the tabby stripes (optional)
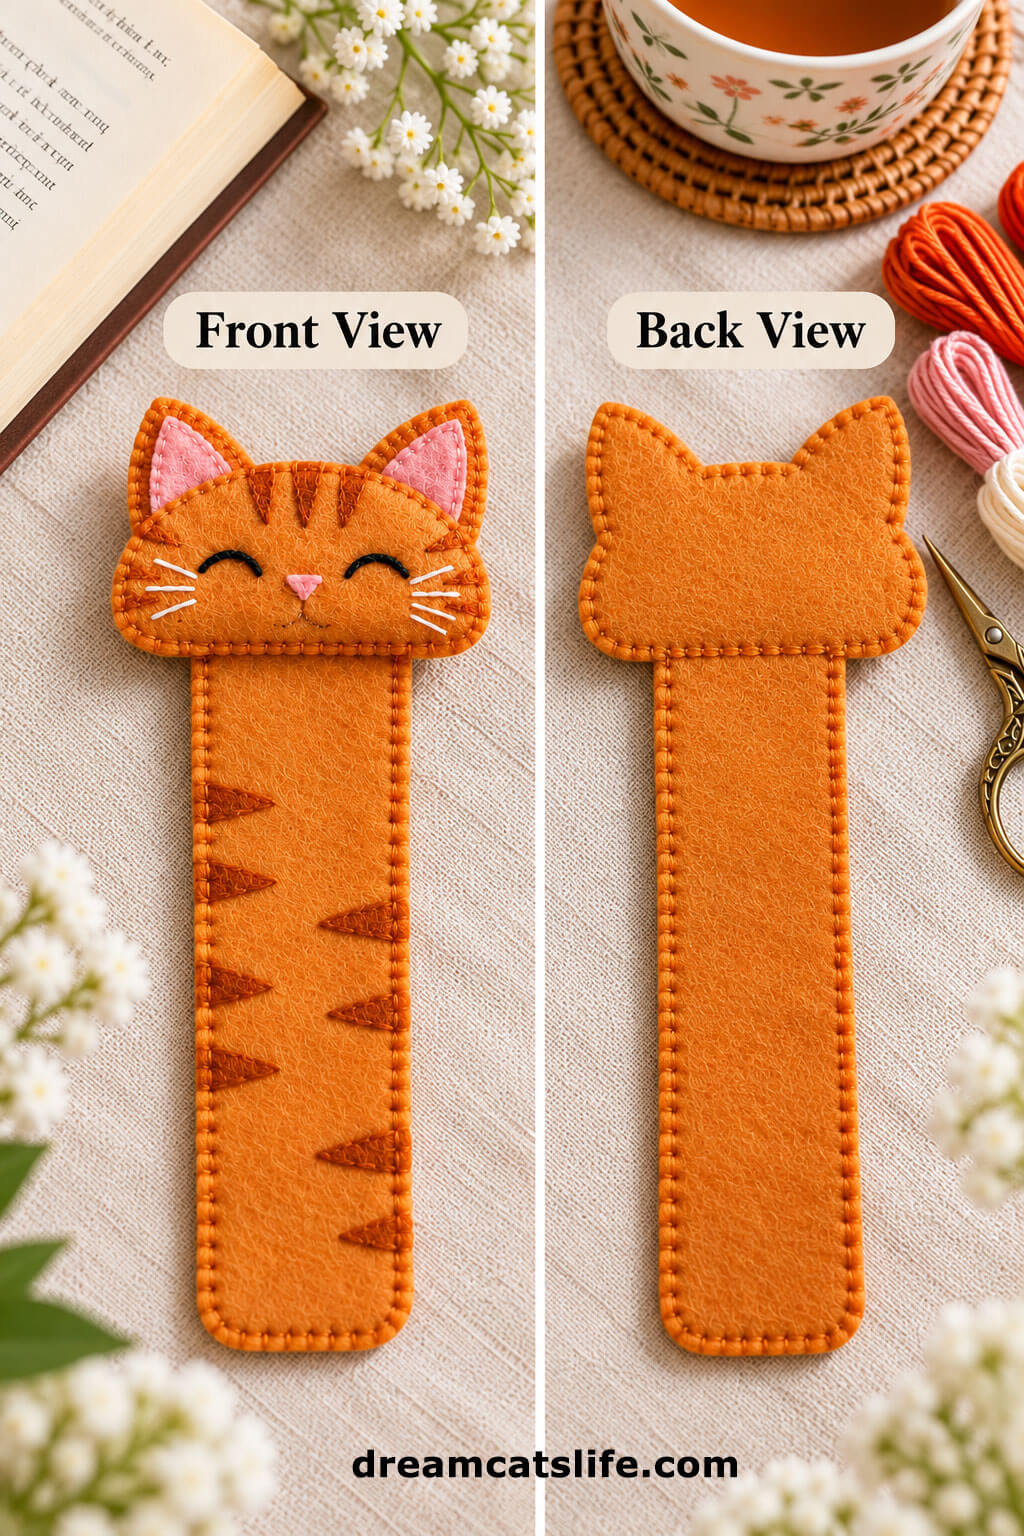
For the ginger-tabby look in the photos, cut small triangle stripes from darker orange felt.
- Put three or four short stripes on the forehead of the front head piece.
- Put several triangle stripes along the sides of the body, alternating from the left and right edges.
Glue each stripe down, then stitch it with a few tiny stitches. Stripes in the same felt family give a subtle, cozy result, while higher-contrast stripes look bolder.
Step 4: Embroider the face
This step gives your cat its personality, so do it before assembling the pieces. It’s much easier to embroider a flat piece than a finished bookmark.
- Eyes: Use two strands of black floss. Stitch two small upward-curving arcs for sleepy, happy closed eyes. A back stitch gives a clean curved line.
- Nose: Cut a tiny triangle from pink felt and glue it between the eyes, or stitch a small pink triangle with satin stitch.
- Mouth: Add one tiny stitch below the nose, with a small “v” shape for a cute smile.
- Whiskers: Use white or cream floss. Stitch three short straight stitches on each cheek.
Mark the face positions lightly with a washable marker first. Place the eyes low and wide for the cutest look. If curved stitches are hard, use two tiny straight stitches at an angle for each eye. The cat will still look sleepy and sweet.
Step 5: Sandwich the body between the head pieces
Now the pieces come together. This is the “peeking” part of the design.
- Lay the back head piece flat.
- Place the body strip on top, with its top edge tucked slightly under the head area. The long strip should hang down below the head.
- Place the front head piece (with embroidery) on top of everything.
- Line up the edges and secure with clips or a few dots of glue.
The head should cover the top of the body strip, with the bottom of the strip hanging down so it slides inside a book.
Step 6: Stitch around the head
Stitch around the edge of the head with a blanket stitch or a neat whipstitch. Use two strands of floss and keep your stitches about 1/8 inch (3 mm) long and evenly spaced.
Start from the neck on one side, stitch up around one ear, across the top of the head, around the other ear and back down the other side. Take your time on the ear curves and corners. Put one stitch right at each ear tip to hold the point firmly.
Step 7: Stitch the body
Next, stitch around the body strip. Align the front and back body pieces and stitch down one side, across the bottom and up the other side, using the same stitch as the head so the outlines match.
You can leave the very top open if the head already holds it closed, or stitch all the way around for a sturdier bookmark.
Step 8: Finish and trim
Knot the thread on the back and hide the tail between the felt layers. Trim any stray thread ends and fuzzy felt around the edges. Check that the ears are firmly attached.
Slide your cat bookmark into a book and enjoy.
Stitching Guide: Which Stitch to Use Where
| Part | Stitch | Floss strands |
|---|---|---|
| Outline of head and body | Blanket stitch or whipstitch | 2 |
| Inner ears | Running stitch | 1-2 |
| Eyes | Back stitch | 2 |
| Whiskers | Straight stitch | 2 |
| Mouth | Straight stitch | 1-2 |
| Stripes | Tiny straight stitch or glue only | 1 |
Pro Tips for a Neater Felt Cat Bookmark
Choose the right felt
Craft felt (acrylic) is cheap and easy to find, but it can pill. Wool-blend felt is firmer and holds a crisp shape, so it’s the best choice for a bookmark you want to last.
Keep stitches small and consistent
Even stitches make a handmade piece look professionally finished. Mark the stitch spots with tiny dots if you want them to match perfectly.
Use a thimble if the felt is thick
Two layers of wool felt plus a body strip can be hard on your fingertips.
Don’t pull the floss too tight
Tight stitches can pucker the felt. Pull just until the stitch lies flat against the surface.
Use a hoop for the face
An embroidery hoop keeps small facial details tidy, but remove the hoop before you sandwich the layers.
Cut once, carefully
Because felt doesn’t fray, small cutting errors are easy to fix by trimming evenly all around the shape.
Troubleshooting Common Problems
The ears look lopsided
Cut the second ear using the first as a template, and trim both together if needed.
The stitches are uneven
Mark the stitch spots with tiny dots using a fabric pen. It takes a few extra minutes and makes a big difference.
The face looks crooked
Pin a paper copy of the face onto the felt and sew through it, then tear the paper away.
The floss tangles
Use shorter lengths, about 18 inches (45 cm), and separate the strands before threading.
The bookmark curls or bends
Press it flat under a heavy book overnight. Wool-blend felt flattens easily.
The head peeks out too far (or not enough)
Adjust how far the body strip tucks under the head before stitching. About 1/2 inch of overlap is usually enough to hold it firmly.
Felt Cat Bookmark Variations and Ideas
Once you’ve made the classic version, you can customize it endlessly.
A whole litter of peeking cats
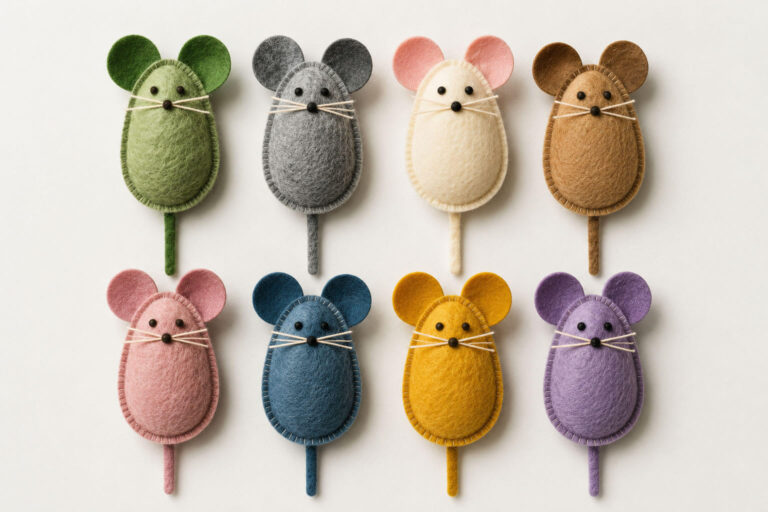
Make a set in different colors: orange tabby, gray, black, cream and calico. A group of cat bookmarks makes a cute shelf display or a set of gifts, one for each friend who loves books.
Color ideas
- Ginger tabby: orange felt with darker orange stripes (the version in the photos)
- Tuxedo cat: black felt with a white muzzle and chest
- Gray cat: soft gray with pink inner ears
- Calico: white base with orange and black patches
- Siamese: cream with dark brown ears and face
Personalized details
- Add a tiny bow or bell at the neck
- Embroider a name or initial on the body
- Stitch a heart on the cat’s cheek
- Add a tassel or ribbon at the bottom for extra style
- Make a sleeping cat by adding “Zzz” stitches
Make it a gift set
Pair the cat bookmark with a paperback, a small tea sample or a handwritten note. You can find packaging supplies with these searches:
- Kraft gift boxes small
- Cellophane gift bags small
- Cat themed bookmarks, useful for inspiration or for gifts when you run out of time
Make it with kids
The classic design is also a good children’s craft. Let kids glue the stripes and pick the colors while an adult does the sewing. For younger children, you can replace stitching with fabric glue and use felt cat bookmark craft kits for a no-prep activity.
Selling or Gifting Your Handmade Cat Bookmarks
Felt bookmarks are popular at craft fairs and on handmade marketplaces. Some practical suggestions:
- Photograph them on a book, with a cup of tea or dried flowers for a cozy look
- Sell them as sets of three with different cat colors
- Add a small card with care instructions
- Use clean, even stitching, since buyers notice quality
If you plan to sell, use your own designs or patterns you have permission to use commercially.
How to Care for a Felt Cat Bookmark
- Spot-clean with a damp cloth and mild soap
- Don’t machine wash, because felt can shrink and lose its shape
- Let it air-dry flat
- Store it inside a book or flat in a drawer to keep the shape
Frequently Asked Questions
How do you make a felt cat bookmark?
Cut a body strip and a cat head with ears from felt, add pink inner ears, embroider a simple face, then sandwich the strip between two head pieces and stitch around the edges. The full process takes about 60-90 minutes.
What kind of felt is best for a bookmark?
Wool-blend felt is best because it is thick, holds its shape and doesn’t pill. Standard craft felt also works well for a budget-friendly or kid-friendly version.
Do I need a sewing machine?
No. This is a hand-sewing project. You need only a needle, floss and scissors.
Can I make a felt cat bookmark without sewing?
Yes. Use fabric glue to attach the layers and add the face with felt scraps or a fabric marker. A sewn version is more durable, though.
How big should the bookmark be?
A body of about 2 x 6 inches (5 x 15 cm) with the cat head on top fits most paperbacks and hardcovers. Print the pattern at 100% and check the 1 inch test square for accuracy.
How long does it take?
Beginners usually need 60-90 minutes. Experienced crafters can finish one in about 45 minutes, and a batch of several in an afternoon.
What stitch is best for the edges?
A blanket stitch gives a neat decorative border, while a whipstitch is faster and simpler. Both work well on felt.
Is this a good project for beginners?
Yes. It uses only basic stitches, felt doesn’t fray, and the shape is simple. It is one of the most beginner-friendly felt crafts.
What can I use if I don’t have embroidery floss?
Regular sewing thread (doubled) or thin yarn can work, but embroidery floss gives the best coverage and looks neatest on felt.
Final Thoughts
A felt cat bookmark DIY is a small project with a big payoff. In an afternoon, you can turn a few felt scraps into a handmade gift or a charming reading companion. Start with the classic peeking cat, then experiment with colors, stripes and details until you have a whole litter for your bookshelf.
Download the pattern, gather your felt and start stitching. Your next book deserves a cat bookmark.