Cat Themed Advent Wreath: A Step-by-Step DIY Christmas Guide
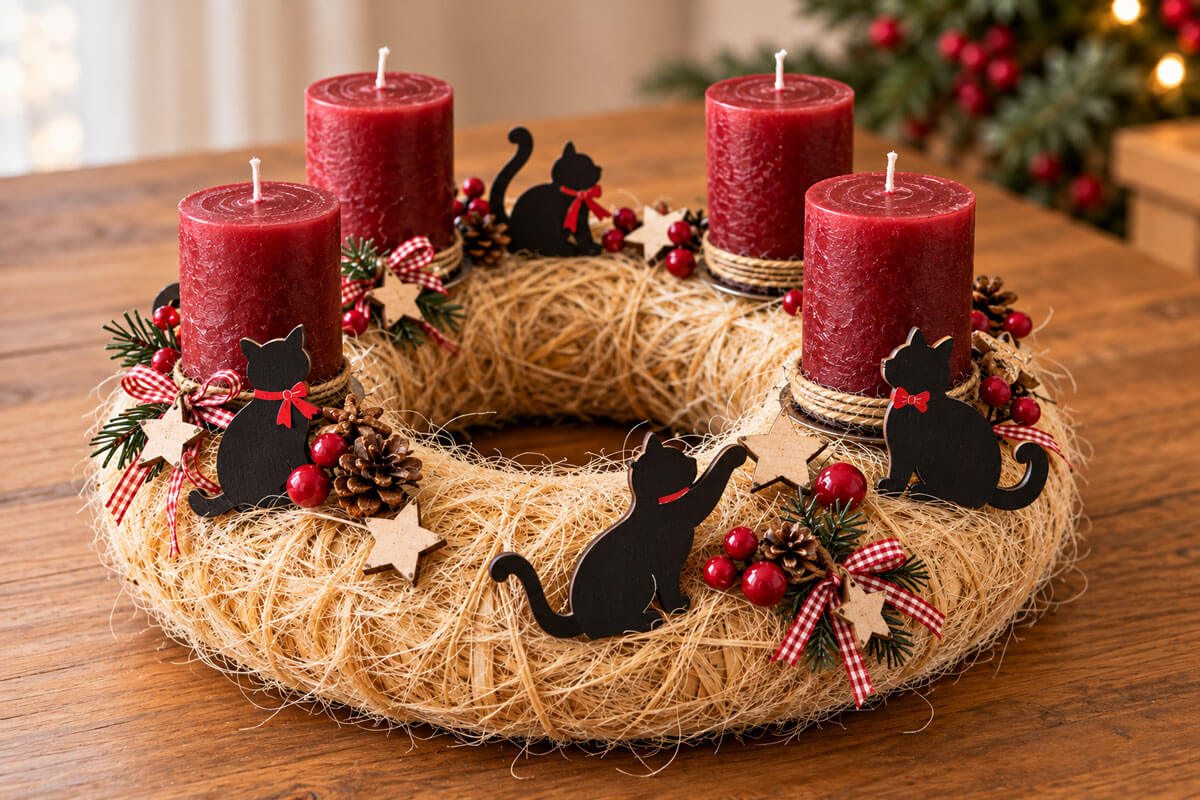
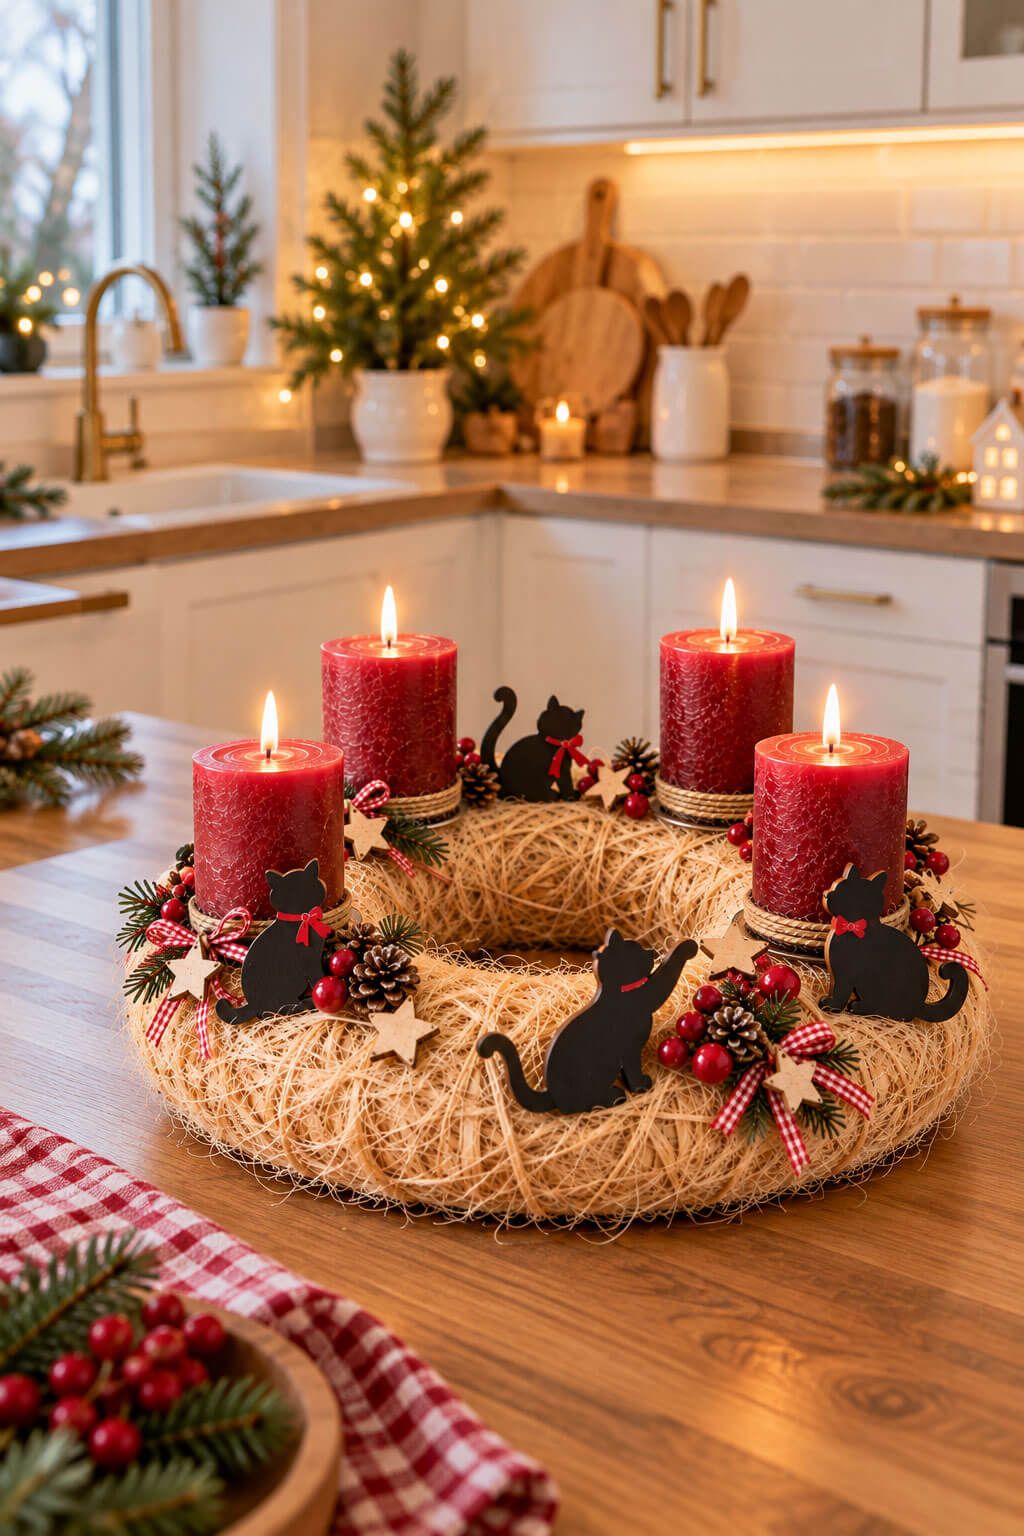
Every December, the same question comes up in cat-loving homes: how do you celebrate Christmas without leaving out the family member who sits in the middle of every decoration anyway? A cat themed advent wreath is a charming answer. Picture a fluffy natural sisal ring, four deep burgundy candles wrapped in jute twine, and playful black cat silhouettes wearing tiny red bows, one of them even batting at a wooden star. It is warm, rustic, a little humorous, and unmistakably yours.
This guide walks you through a complete DIY advent wreath, from the materials list to the final safety check. You will also find tips for cat decor that looks refined rather than kitschy, common mistakes to avoid, and honest advice on keeping real cats and real candles safely apart.
Quick overview
- Difficulty: Beginner-friendly
- Time needed: About 2 to 3 hours, plus paint drying time
- Estimated budget: $35 to $65, depending on what you already own
- Style: Rustic farmhouse with black cat silhouettes, burgundy, natural tan and red-and-white gingham
- Best for: Dining tables, kitchen islands and sideboards (out of your cat’s reach when the candles are lit)
What Is an Advent Wreath, and Why Add Cats?
An advent wreath is a circular arrangement of greenery or other natural materials holding four candles. The tradition counts down the four Sundays before Christmas: you light one candle on the first Sunday, two on the second, and so on until all four glow together. In 2026, Advent begins on Sunday, November 29, so you have plenty of time to build yours.
The classic version uses evergreen branches and candles in purple and pink. Many modern families skip the liturgical colors and choose a palette that fits their home. Burgundy candles, as used in this project, feel traditional and cozy and look fantastic against a pale, textured base.
So why cats? Because a black cat silhouette is one of the most graphic, versatile shapes in cat decoration. Against golden sisal it pops. It also gives you an excuse to tell a story on your table: one cat sits proudly wearing a bow, one looks over its shoulder, and one reaches up for a star as if it were a toy. That small narrative is what turns a standard wreath into a conversation piece. If you love cat decor the rest of the year, this is a natural way to bring the same personality into the holidays.
Materials and Tools You Will Need
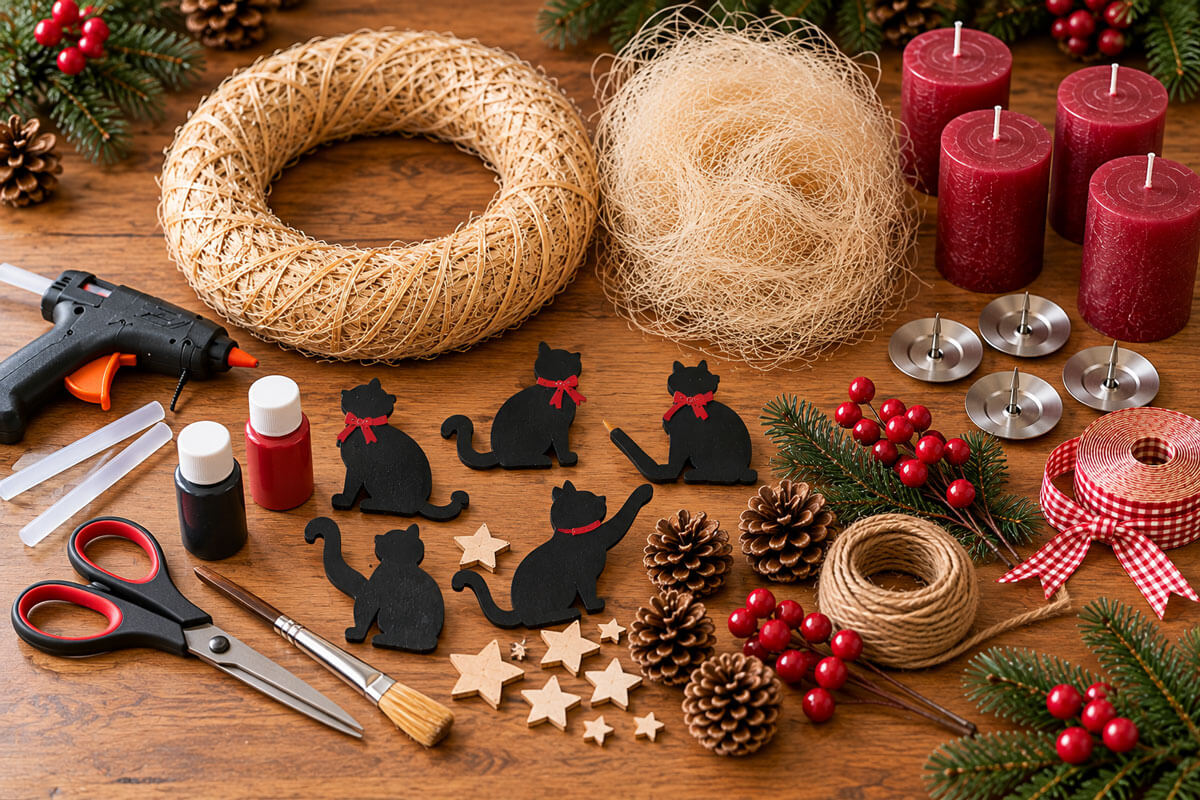
Most of these supplies come from a craft store or an online order. Here is the full list, with search links so you can compare options and prices yourself.
For the wreath base and candles
- One straw wreath form, about 12 to 14 inches across. Browse straw wreath forms
- Natural sisal fiber (sometimes sold as sisal tow or sisal hemp). Plan on one large bag. Find sisal fiber for wreaths
- Four candle spikes or candle holders with prongs, sized for your candles. Shop advent candle spikes
- Four burgundy pillar candles, ideally 3 inches wide and 4 to 5 inches tall, with a rustic textured finish. Compare burgundy pillar candles
- Thick jute twine or jute rope for wrapping the candle bases. See jute twine
For the cat decoration
- Flat wooden cat shapes in different poses, about 3 to 5 inches tall (sitting, reaching, tail curled). Browse unfinished wooden cat cutouts
- Black acrylic paint, matte finish. Find matte black acrylic paint
- Narrow red satin ribbon for collars and bows. See thin red ribbon
For the finishing touches
- Natural pine cones in assorted sizes. Shop craft pine cones
- Red berry picks in a glossy finish. Compare red berry picks
- Small wooden stars. Find wooden stars
- Artificial pine sprigs. Browse faux pine picks
- Red-and-white gingham ribbon, wired edge if possible. See gingham ribbon
Tools
- Hot glue gun with plenty of sticks (compare glue guns)
- Scissors, wire cutters, a small flat paintbrush and a pencil
Product links open Amazon search results, so you can pick the size, brand and price that suit you.
Step-by-Step: How to Make a Cat Themed Advent Wreath
Work on a protected table, keep your cat out of the craft room (glue sticks, ribbon and loose fibers are tempting), and lay every embellishment out before gluing. A little planning makes the finished DIY look professional.
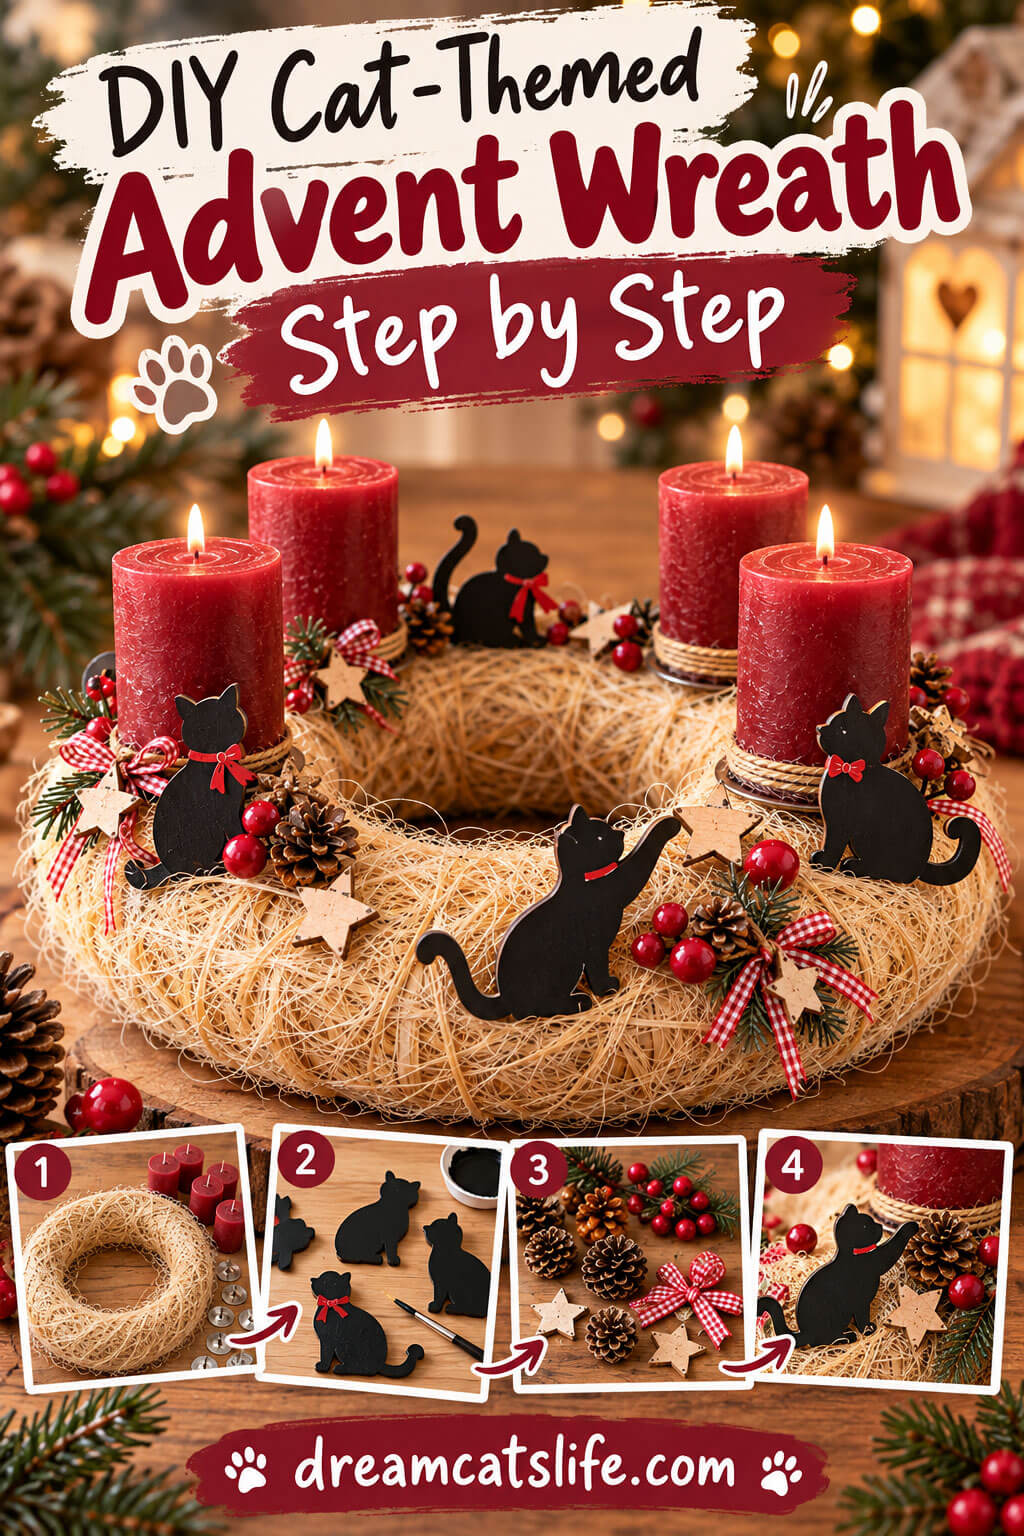
- Prepare the base: wrap the wreath in sisal
Heat your glue gun and pull a handful of sisal fiber from the bag. Fluff it apart with your fingers so it is airy, not clumped. Lay the fibers around the straw wreath form and secure them with hot glue, working in small sections and turning the form as you go. Overlap each layer so the straw underneath disappears. The goal is a full, naturally untidy look, with wispy strands standing out like golden fur. Trim stray lengths if they look too wild, but leave plenty of texture. Press the fibers down with a piece of scrap cardboard rather than your fingers to avoid glue burns. - Mount the candle spikes
Set your four candles (or just the spikes) on the wreath to find the spacing. Place the four candle spikes at equal distances, like the 12, 3, 6 and 9 on a clock face, or use a slightly offset layout like the one in the photo for a relaxed look. Push each spike straight down through the sisal into the straw until it sits firmly. Add a ring of hot glue around each base for extra hold. Check with a ruler or by eye from above: uneven spacing is the first thing people notice. - Dress the candles with jute twine
This small detail adds enormous charm. Wrap thick jute twine around the lower part of each candle three to four times, keeping the coils neat and close together. Secure the ends with a dab of hot glue on the back, placed on the twine only, never melted onto the candle itself, and tuck them out of sight. Keep the twine low, no higher than the bottom inch or so, so it sits well below the flame as it burns down. - Place the candles on the spikes
Press each burgundy candle straight down onto its spike with a gentle twisting motion until it is firmly seated. Give each one a light wiggle test. A candle that leans will drip, burn unevenly and may tip. If the candle base is slightly narrow for the spike, wrap a thin strip of florist tape around the spike for a snug fit. - Paint the wooden cat figures
Give each cutout two thin coats of matte black acrylic paint rather than one thick coat. Paint the edges and both sides if you want a polished look from every angle. Let each coat dry completely, usually 20 to 30 minutes, before the next. If you like a slightly rustic finish, leave a hint of natural wood at the edges or lightly sand the dried paint. A coat of matte sealer is optional but helps prevent chipping. - Give the cats their collars and bows
Cut short lengths of narrow red ribbon. For a collar, wrap the ribbon around the neck area and glue the ends at the back. For a bow, tie a tiny bow, trim the tails at an angle, and glue it at the throat. Mix styles so the cats have individual personalities: one with a big bow, one with a simple band, one with a bow tie. If your ribbon frays, dab the cut ends with a little clear glue or seal them carefully with a lighter, away from the wreath and candles. - Prepare the remaining decorations
Gather and sort the pine cones, red berries, wooden stars, faux pine sprigs and gingham ribbon. Trim berry picks and pine sprigs to short, manageable lengths with wire cutters. If your pine cones have been outdoors, bake them on a foil-lined tray at 200°F for about 30 minutes to remove insects and dry any sap. Cool them before you handle them. - Glue on the larger decorations first
Start with the pieces that carry the design. Glue the cats first, then the pine cones and wooden stars. Spread the cats around the wreath so your eye travels in a circle: one near a candle, one facing inward, one reaching toward a star. Hold each piece for ten seconds while the glue sets. Because wooden cats are flat, you can glue a small block of foam or a bit of cardboard behind each one to help it stand upright. Rest the base of each figure into the sisal so it looks as if it is sitting there naturally. - Tuck in greenery and berries
Now fill the gaps. Place the faux pine sprigs around each candle base and along the outer edge of the wreath, angling them outward as if growing from the sisal. Add small clusters of red berries, using odd numbers (three or five) for a natural effect. Vary the sizes, and push the wire stems deep into the straw before adding glue. - Make and attach the gingham bows
Cut a piece of red-and-white gingham ribbon about 14 inches long. Form two loops, pinch the center and wrap it with thin wire or a small ribbon strip. Leave long tails and cut them in a V shape. Glue one bow near each candle so it frames the base, tucking the tails along the wreath. Small bows between the cats, stars and berries tie the whole arrangement together. - Final touches and safety check
Turn the wreath slowly and look at it from every side. Press down anything that moves, trim visible glue strings, and fluff the sisal. Make sure each candle is straight and stable, and that no ribbon, twine or dried material sits close to a wick. If a decoration is within an inch or two of a flame, move it back or remove it. Never leave burning candles unattended, and keep every flame well away from the sisal and other flammable elements.
Fire safety first: Sisal, straw, jute, dried cones and paper-based ribbon burn easily. Light the candles only when you are in the room, keep them away from drafts, and extinguish them before they burn down to the decorations. If you are not comfortable with this risk, use high-quality flameless LED pillar candles (see flameless candles); they look surprisingly convincing and keep the cat-themed look without any open flame.
Keeping Real Cats Safe Around Your Advent Wreath
A wreath covered in cat figures will attract real ones. Cats love texture, dangling ribbon and anything that rustles, so plan for it.
- Choose artificial greenery and berries. Many real holiday plants, including holly, mistletoe and some pine oils, can irritate or poison pets. Faux pine and plastic berries remove the guesswork. Even so, discourage chewing, since small parts can be a choking hazard.
- Glue everything securely. Tug-test each cat, star and berry before displaying the wreath. A piece that comes loose can be swallowed.
- Keep ribbon short and trimmed. Long, dangling ribbon is a known risk if swallowed. Trim the tails of your gingham bows and the cat collars to a modest length.
- Pick a high or closed-off display spot. A sideboard, mantel or table in a room with a door works well. Always block your cat’s access completely while candles burn.
- Watch for sisal chewing. Some cats love fibrous textures. If yours starts to chew the wreath, move it or swap it for a harder base.
- Consider scent. Heavily scented candles and essential oils can bother cats. Pick unscented or lightly scented candles, and ventilate the room.
Common Mistakes to Avoid
After seeing how often a promising DIY Christmas project goes slightly wrong, these are the problems worth planning around.
- Skipping the layout step. Gluing the first cat before you have arranged everything leaves you with uneven spacing. Dry-fit all pieces first.
- Using too much glue. Thick blobs look messy and can melt through ribbon. Use small, firm dots and let them set.
- Painting thick coats. Heavy black acrylic wrinkles and takes forever to dry. Two thin coats look much better.
- Placing decorations too close to the wicks. A pretty berry cluster next to a flame is a hazard. Keep all flammable decor at least a few inches from the candles.
- Choosing candles that are too thin for the spikes. Wobbly candles are the number one stability problem. Match candle diameter to spike size before you begin.
- Overcrowding the wreath. The sisal texture is half the beauty. Leave breathing room around the cats so each silhouette reads clearly.
- Burning candles all the way down. Extinguish them when about two inches remain, especially on a flammable base.
Styling Tips and Variations
Once you have the basic wreath, a few changes can make it feel tailored to your home.
Match your own cat
If your cat is tabby, ginger or gray, paint a few figures to match. A single ginger silhouette among the black ones is a fun personal touch. You can also write your cat’s name on a tiny wooden tag and tie it to a bow.
Try a different palette
Burgundy and natural tan look warm on a white or wooden table, but this cat decoration works in other colors too. Forest green candles, cream with gold stars, or traditional purple and pink candles all work with the black silhouettes. For a modern look, swap the gingham for solid velvet ribbon.
Build a matching table scene
Place the wreath on a wooden board, add a few extra pine cones and a small bowl of ornaments, and place a single cat figure on the table beside it. A runner in plain linen or buffalo check completes the look without competing with the wreath. If you enjoy collecting cat decor, add a ceramic cat ornament or a cat-themed candle holder nearby (browse black cat Christmas decor).
How to Care for and Store Your Wreath
A well-made advent wreath can return for many years. After Christmas, remove the candles and spikes, then dust the wreath with a soft brush or a hairdryer on its cool setting. Check the glue joints and reattach any loose pieces. Store the wreath in a large box or a breathable fabric bag, in a cool, dry place, with tissue paper around the cats so the paint does not rub off. Keep it away from damp basements, which can encourage mold on natural fibers. Next year, you can freshen it with new candles and ribbon in minutes.
Frequently Asked Questions
Can I make an advent wreath if I have cats?
Yes. Choose artificial greenery, glue every piece firmly, and display the wreath where your cat cannot reach it. Never leave candles burning unattended, and keep your cat out of the room while they are lit. Flameless candles are a good alternative.
When do you light the first candle on an advent wreath?
The first candle is lit on the first Sunday of Advent, four Sundays before Christmas. In 2026, that is November 29. Add one more candle each following Sunday.
What if I do not want to paint the cats myself?
You can buy ready-made black wooden cat silhouettes, or use felt or cardstock cut into cat shapes and stiffened with a thin backing. Painting is simply the most affordable way to customize the poses and finish.
How long does a DIY advent wreath last?
With artificial greenery and proper storage, a sisal-based wreath can last for many seasons. Replace the candles each year and re-glue anything that comes loose.
Final Thoughts
A cat themed advent wreath proves that Christmas decorations can be thoughtful, traditional and playful at the same time. With a sisal-wrapped base, burgundy candles in jute twine, black wooden cats in red bows, and a scattering of cones, stars, berries and gingham, you create a centerpiece that looks handmade in the best way. Take your time, plan the layout, respect the candle safety rules, and keep the real cat out of the craft supplies. Then light the first candle on the first Sunday of Advent and enjoy the countdown.
Whether you are a longtime fan of cat decor or just starting your first DIY holiday project, this wreath is a cozy way to bring your favorite animal into the season. Happy crafting, and happy Advent!